
Welcome to thatlinuxbox.com Tuesday, July 14 2026 @ 12:28 AM UTC
How to Install Minecraft Mods on Linux
- Thursday, August 18 2016 @ 07:05 PM UTC
- Contributed by: Dan Stoner
- Views: 134,860


See the "Additional Notes" section near the bottom of this article for more info on installing and running the java version of Minecraft on Linux.
The first thing I noticed when I started looking at Minecraft mods is dependencies. One major dependency to note is the Minecraft version. At the time of this writing the current version of Minecraft is 1.10.x. Many mods required older versions. For example, to run the OreSpawn mod you need to use Minecraft 1.7. Also, you must first install something called Minecraft Forge (minecraftforge.net) or just "Forge" for short, and it must be the version of Forge that matches the specific version of Minecraft you need to run (as required by the mod).
I found the following video helpful since many of the online howtos are either terrible or written for older versions of Minecraft. For example, they talk about modifying the minecraft.jar and files in the .minecraft/bin directory, neither of which exist in recent versions of Minecraft. I learned from the video that installing Forge and compatible mods is actually embarassingly easy. There is no unzipping or modifying .jar files or deleting META_INF from inside archives, etc.
Here is a summary of the steps that I use to install Minecraft mods on Linux:
1. Download and Run the Forge Installer
In my case I want to run mods that are compatible with Minecraft 1.7. So I locate and download the "installer" from Forge that matches the desired version.
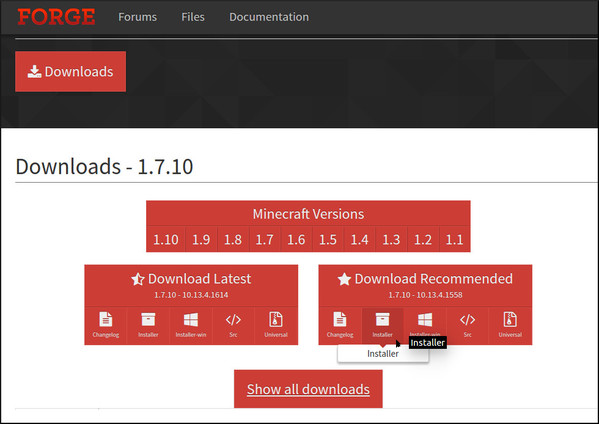
Beware, the free file hosting sites where the actual downloads live try to trick you in a dozen ways to click on something other than your actual file download.
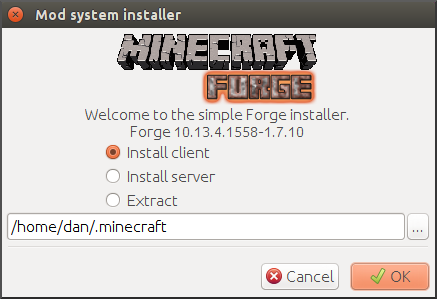
Once downloaded, we need to "run the jar". On my computer, clicking a .jar file does not execute it (it opens it like an archive instead), so I just run the jar file from the command line which will start the graphical installer.
$ java -jar forge-1.7.10-10.13.4.1558-1.7.10-installer.jar
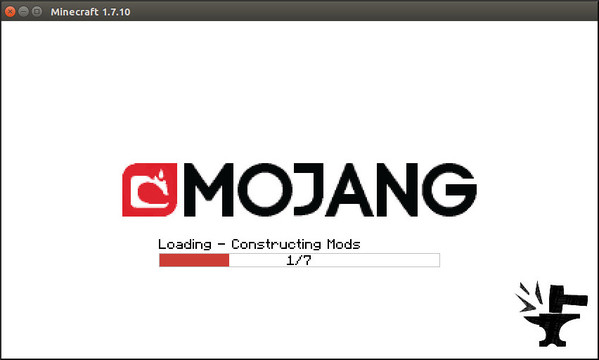
2. Run Minecraft to verify Forge is properly installed
There should now be a profile named "Forge" available in the lower left list of profiles. Start Minecraft using the "Forge" profile.

Forge will do some work.
After Minecraft loads at least once with Forge installed, it is ok to install the actual mods. Exit Minecraft.
3. Download and install mods
Download the mods and place them in the .minecraft/mods directory. Other than being very careful to download a legitimate mod file and navigating the download sites carefully... that's it! The mod files that go into "mods" may be either .zip or .jar format.
4. Run Minecraft with the new mods installed
Again start Minecraft and choose the "Forge" profile. Forge will notice the new files in the mods directory and do some additional work to prepare them:
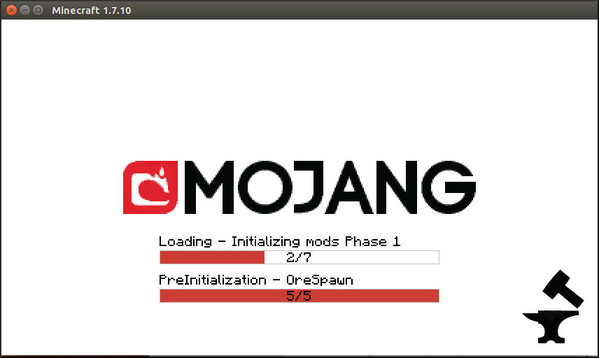
Once Minecraft starts there will be evidence of loaded mods in the bottom left:
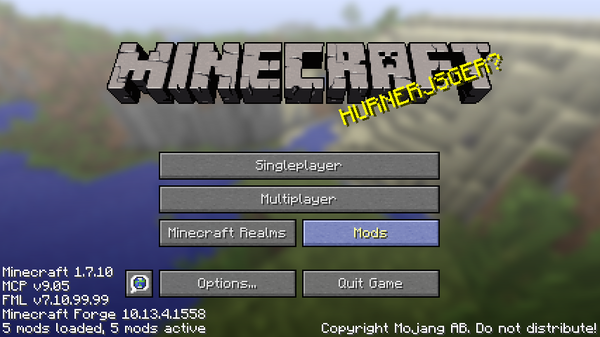
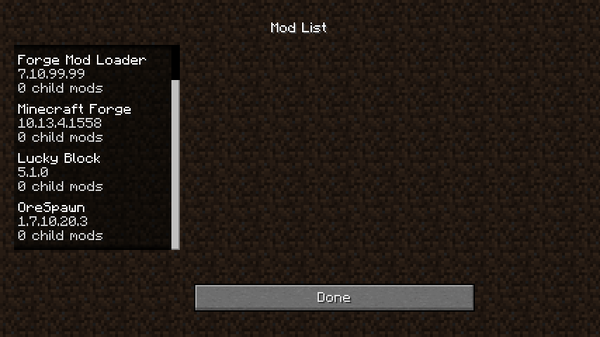
Clicking on the "Mods" button will give more detailed information about the mods that are loaded. Here we see that we successfully loaded OreSpawn and Lucky Block.
Additional Notes on setting up Java and Minecraft on Linux
I have had the best luck running Minecraft on Linux by using Oracle Java from http://java.com (the 64-bit .tar.gz download). The following notes lead to the desired behavior of the "java" command being available.
To install or update java, the extracted tar.gz from Oracle goes under /usr/local/ and the symlink in /usr/local/bin is updated so "java" points to the new binary.
At the time of this writing, the latest version from Oracle's website was Version 8 Update 101. Downloading the file labled "Linux x64" put a file named jre-8u101-linux-x64.tar.gz in my Downloads directory.
$ cd Downloads
$ tar -xvzf jre-8u101-linux-x64.tar.gz
jre1.8.0_101/

jre1.8.0_101/THIRDPARTYLICENSEREADME-JAVAFX.txt

jre1.8.0_101/THIRDPARTYLICENSEREADME.txt

jre1.8.0_101/lib/

jre1.8.0_101/lib/flavormap.properties

jre1.8.0_101/lib/jexec

...
$ sudo mv jre1.8.0_101/ /usr/local/
$ sudo rm /usr/local/bin/java # if we are replacing the existing version

$ sudo ln -s /usr/local/jre1.8.0_101/bin/java /usr/local/bin/java

$ ls -la /usr/local/bin/java

lrwxrwxrwx 1 root root 32 Aug 3 20:46 /usr/local/bin/java -> /usr/local/jre1.8.0_101/bin/java
This is how the system will look after java is in the executables path:
$ which java

/usr/local/bin/java
Confirm that the latest version of java is available to the system with the -version paramenter (single hyphen):
$ java -version

java version "1.8.0_101"

Java(TM) SE Runtime Environment (build 1.8.0_101-b13)

Java HotSpot(TM) 64-Bit Server VM (build 25.101-b13, mixed mode)
To run Minecraft from the command line, I use the Minecraft.jar that was downloaded from Mojang's website.
$ java -jar Downloads/Minecraft.jar
On first run, this creates a .minecraft folder in one's user profile directory and will download the actual minecraft launcher and other files under the .minecraft directory. Mods, profiles, settings, and everything else will go under the .minecraft directory.
I actually usually make a .desktop or launcher file so I have an easy clickable icon for starting Minecraft from the desktop (how to do this depends on which particular Linux distro is being used and is beyond the scope of this article).
Once base Minecraft has run successfully on the system, the instructions at the top of this article can be used for installing mods.
 GitHub


The following comments are owned by whomever posted them. This site is not responsible for what they say.