Welcome to thatlinuxbox.com Friday, July 03 2026 @ 05:39 PM UTC
Floating Point and Decimal Numeric Types

- Monday, January 10 2022 @ 05:35 PM UTC
- Contributed by: Dan Stoner
- Views: 2,064


Different programming languages and data storage engines use different names for IEEE 754 double-precision floating point (aka "approximate") numbers:
| Language / Engine | IEEE 754 double-precision data type name |
|---|---|
| SQL (Strict Standard) | DOUBLE PRECISION |
| PostgreSQL | double precision or float8 or float |
| Avro | double |
| Python | float or sqlalchemy.Float |
| Java | Double |
| Perl | Floats are platform dependent (double precision on 64-bit x86) |
| C | double |
| Go | float64 |
| Rust | f64 |
Fixed precision Decimal types are often but not always provided by the stdlib:
| Language | Fixed precision / decimal data type name |
|---|---|
| SQL (Strict Standard) | NUMERIC |
| PostgreSQL | numeric |
| Avro | NA |
| Python | Decimal |
| Java | BigDecimal |
| Perl | Math::BigFloat (library) |
| C | NA |
| Go | decimal (via github.com/shopspring/decimal library) |
| Rust | Decimal (via rust_decimal library) |
Floating point naming mahem:
The SQL Standard (SQL-99) defines the following approximate numeric data types:
- FLOAT specifies the data type approximate numeric, with binary precision equal to or greater than the value of the specified _precision_. The maximum value of _precision_ is implementation-defined. _precision_ shall not be greater than this value.
- REAL specifies the data type approximate numeric, with implementation-defined _precision_.
- DOUBLE PRECISION specifies the data type approximate numeric, with implementation-defined precision that is greater than the implementation-defined _precision_ of REAL.
PostgreSQL provides 'real' and 'double precision' but also supports the aliases 'float', 'float8', and 'float4'. The only alias that maps to 'real' is 'float4' (single precision). 'float' maps to 'double precision'.
At least in Python, where 'float' is the language data type for double precision floating point, a database abstraction layer would need to make some bad choices to end up with single precision / Real data type in the persistence layer when talking to a PostgreSQL backend.
The Avro storage enginue uses 'float' for single precision, and only 'double' is mapped to IEEE 754 double precision. At this point it is dubious to me what a python 'float' would get mapped to when writing to Avro.
- Comments (0)
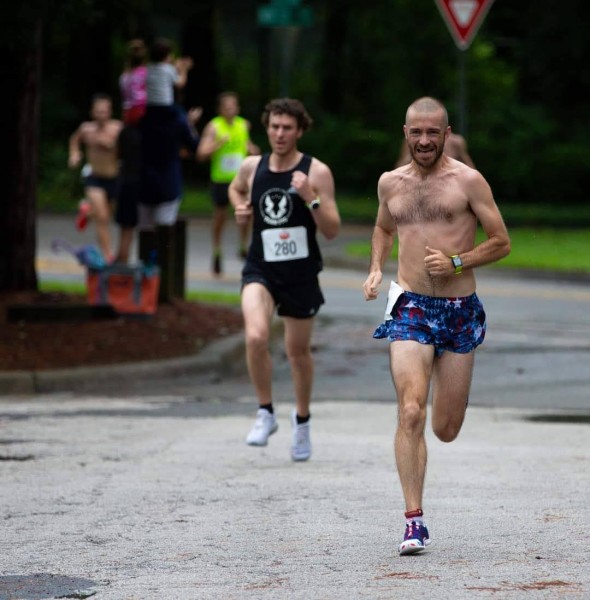
Gate2Gate 50k Trail Race 2021 - Race Report
- Saturday, October 30 2021 @ 06:05 PM UTC
- Contributed by: Dan Stoner
- Views: 1,818

Boom! This race has a real shotgun start.

Photo credit: Joe Kaleita
I used the same fueling strategy and equipment that I did for the Stump Jump, including my Topo Terraventure 2 shoes which I love. Without the elevation and stairs to deal with, I intended to run the entire race. With the exception of a few stops to refill water bottles, etc. I succeeded at running the whole 50k distance.
Photo - coming into an aid station:
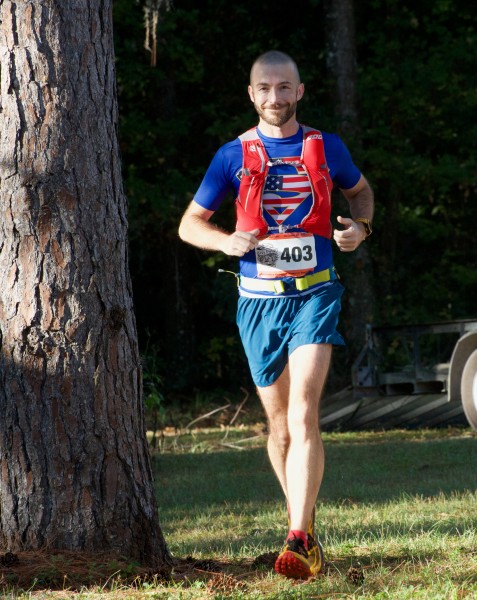
Photo credit: Robert Evans
Coming into the finish line:
- read more (83 words)
- Comments (0)
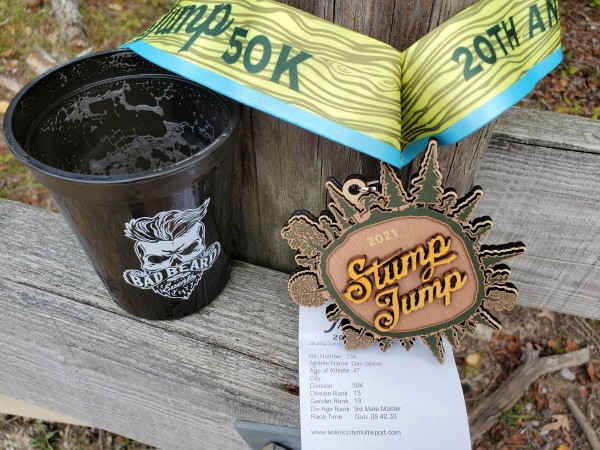
Stump Jump 50k Trail Run 2021
- Monday, October 04 2021 @ 01:39 PM UTC
- Contributed by: Dan Stoner
- Views: 3,441
The night before the race I went to bed early and had a great sleep. Morning breakfast was much larger than my usual cup of coffe. I ate a few spoons of greek yogurt, a banana, and a bowl of oatmeal with chia seeds.
Race fuel, electrolytes, and water setup - I used GU and SaltStick caps, half with caffeine, half without. I carry the SaltStick caps in a flask of honey and water. The "pills" don't tend to dissolve in the bottle, I usually end up shaking it out of the bottle into my mouth after consuming the liquid.
Duke's Shorty Sausages are a real food option but I need to practice with those more. When huffing and puffing up a steep incline it is hard not to get a piece of food down the wrong pipe and then having to deal with coughing for a few minutes. Dried dates also make a great "real food" calorie option for me.
I also carried some granola with me decided not to eat it.
For water I carry two soft flasks in my race vest and a waist pack water bottle.
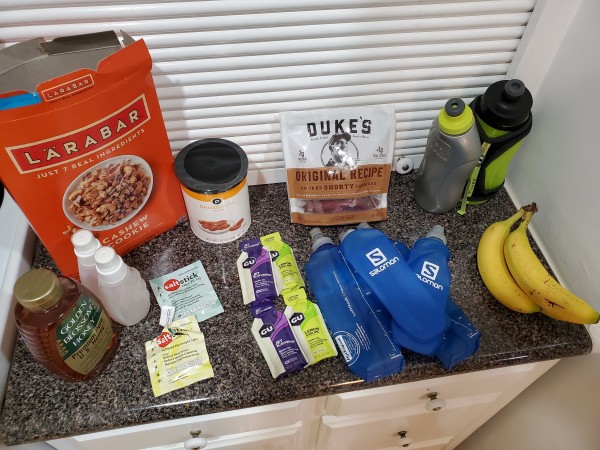
I put the following in my drop bag so I could quickly swap in calories and water quickly:
* two soft water flasks
* one bottle of honey and water mixture with a SaltStick cap
* dried dates and shorty sausages
* Two GU gel packets.
I probably took in at least 700 calories total during the race.
I also had an extra hand-held water bottle in the drop bag just in case, but didn't use it. Aid station staff were doing a good job of filling my waist belt water bottle and the stations were frequent enough. I didn't refill any of the soft flasks during the race, I just changed them out at my drop bag.
- read more (405 words)
- Comments (0)
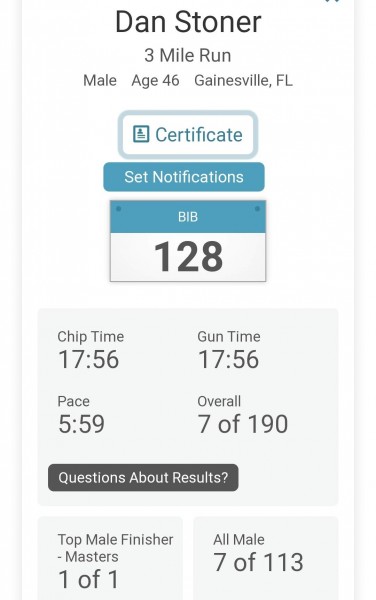
Melon Run 2021
- Monday, July 05 2021 @ 01:26 PM UTC
- Contributed by: Dan Stoner
- Views: 1,887
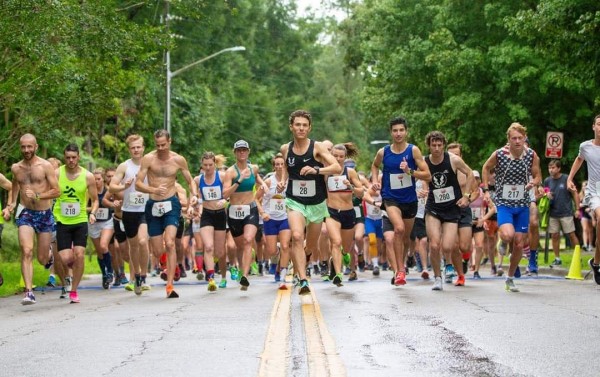
(Photo credit: Florida Track Club)

(Photo credit: Jason Seitz)
I'm very happy with my performance. I was able to really race, hanging on to a solid pack of runners near the front, and out-kicked another age 40+ runner in the last quarter mile to claim the Masters division victory.
(Photo credit: Florida Track Club)
I took home a nice watermelon as my award.
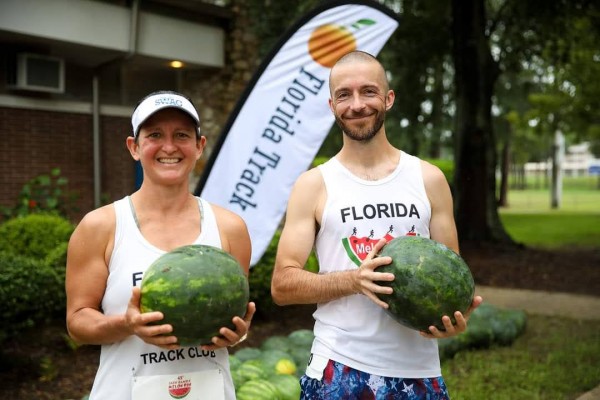
(Photo credit: Florida Track Club)
I think this was my third-fastest Melon Run ever with a time of 17:56. The last time I went under 18 minutes at this race was 2014.
I have been getting good mileage in (generally 50 mile weeks) but not doing any fast race-specific training. I did get one track workout in the week before this race. Feeling good about my fitness!
My left knee has been bothering me over the past month but it is getting better. Good things ahead!
- Comments (0)
Valheim - Game Screenshots on Linux
- Saturday, May 08 2021 @ 12:53 PM UTC
- Contributed by: Dan Stoner
- Views: 2,981


After getting tired of ARK Survival Evolved taking 15 minutes just to load, and the ongoing graphics issues on Linux that have gone unresolved for years, I decided to try something different.
Valheim is an early-access survival game that is available for multiple platforms via Steam including Linux. I have been using Vulcan and have had zero crashes or issues of any kind.

There are plenty of youtube videos and reviews of this game out there, so I won't talk much about the game itself, but the quick summary is that it is a pretty fun survival game. Gathering resources is maybe just a little tedious, and some of the rules like not being able to build without a workbench nearby can be aggravating, but otherwise I think the game finds a good balance of effort in and enjoyment out.
There are a lot of subtle things that help make this game very immersive and fun. For example, when visiting each biome the music changes. The graphics effect of hazing things in the far distance helps make the world feel large. And my real life heart definitely sped up the first time I visited the Dark Forest and saw a Troll.
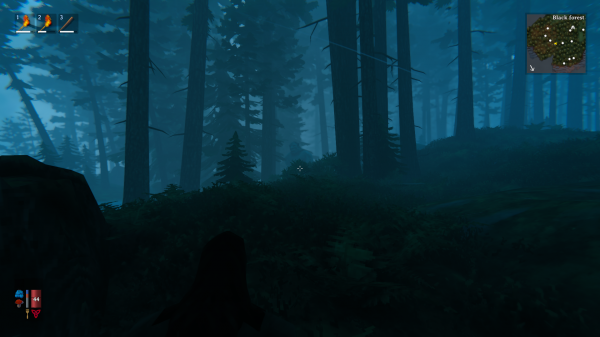
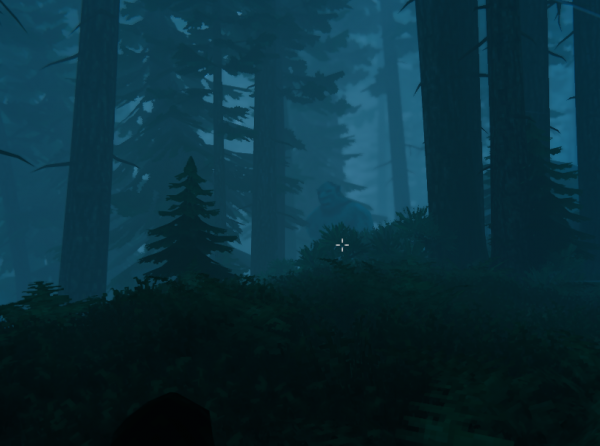
Some more screenshots follow and I also provide details on my gaming rig...
- read more (74 words)
- Comments (0)
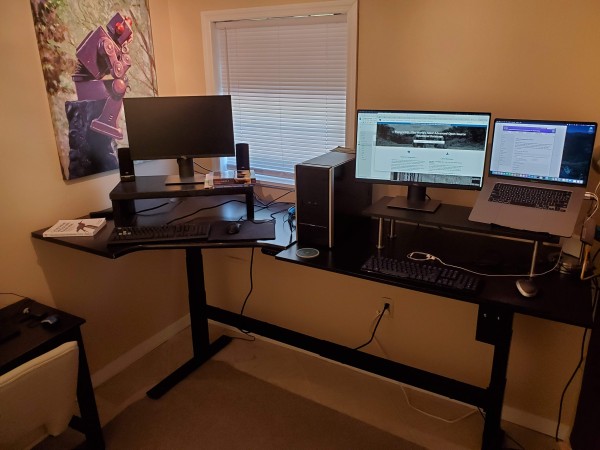
New job - Database Administrator with IRIS
- Tuesday, May 04 2021 @ 02:50 PM UTC
- Contributed by: Dan Stoner
- Views: 2,713

This position is a true Remote job, so I will be working from my home office and hopefully occasionally from other interesting locations.
I assembled the sit-stand desk in my office from an UPLIFT Standing Desk Frame (V2-Commercial) and some used desk surfaces that I picked up from our local salvage yard, The Repurpose Project. This frame is fantastic, remarkably stable (no bounce when typing), and strong enough to support a lot of equipment or heavy surfaces.
- Comments (0)
 GitHub